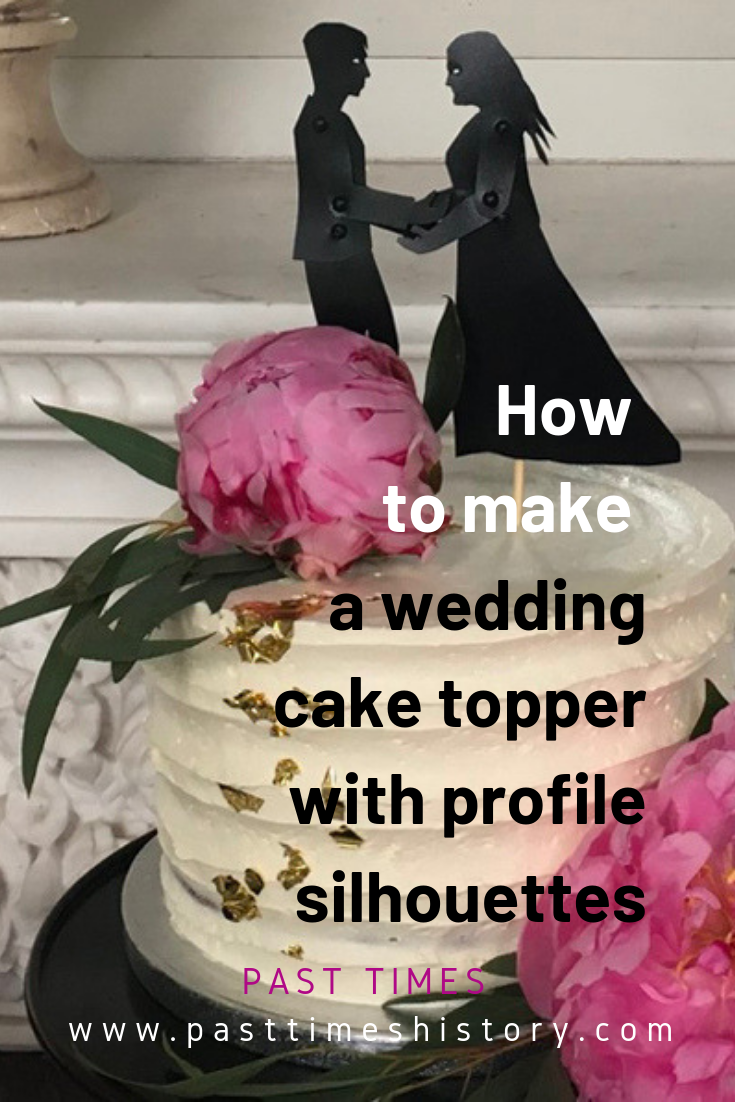
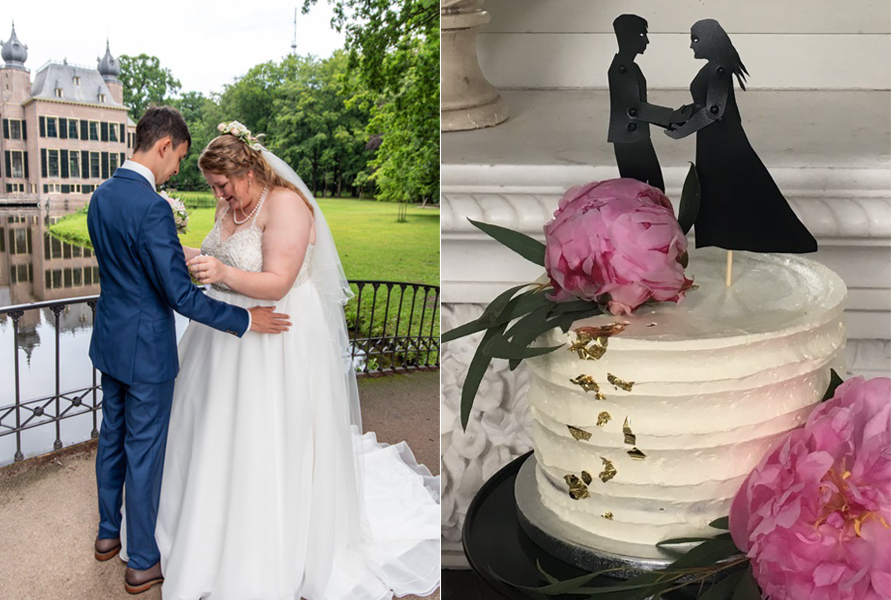
This summer my Dutch-American daughter Sara married the love of her life in a Dutch little castle close to where Ken grew up. Having helped out with shadow puppetry workshops since she was young, Sara asked me to make their wedding cake topper. Below are step-by-step instructions on how you can make a look-alike cake topper of any couple, using free templates and online tools. Ken graciously allowed me to use a profile photo to demonstrate how you can make a silhouette in the free photo editing application You Doodle.
Supplies
- Thin black plastic report cover from stationary store or black poster board
- Small sharp scissors
- Scotch tape or double sided tape
- Optional: black painters tape
- Small black metal brads for scrapbooking
- Barbecue skewers
- Tablet or phone with free app YouDoodle
- Optional: stylus for tracing photo
- Printer and paper to print out a templates from the Printable Library
Making a silhouette profile
If you have access to a mobile phone or tablet, you can use the app YouDoodle to turn a photo into a silhouette. The developer has put a video tutorial on YouTube on how to trace a profile and fill it with the same color. You can find a summary of the instructions in the image below (read from 1 to 4).
Instructions on how to trace a profile using a photocopy machine that reduces images by percentage can be found in How to make shadow puppets of family members.
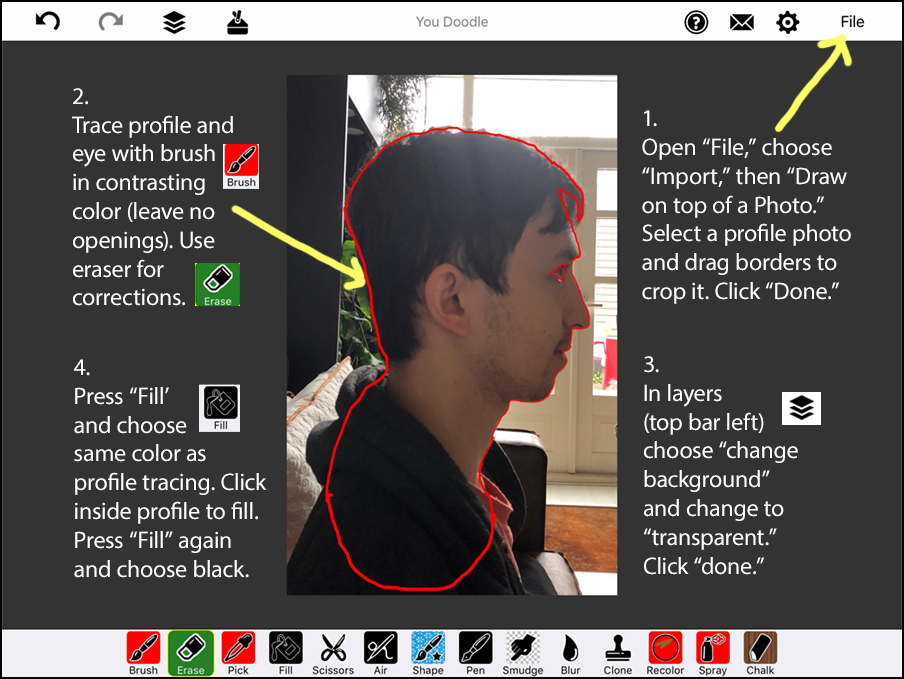
- To trace the profile choose a clear contrasting color.
- If you find it difficult to trace the profile with a finger, it may be easier to use a stylus.
- Don’t forget to outline the eye.
- Make sure that you don’t leave any gaps in the trace. When you press “Fill” and the whole screen fills up rather than just the profile, this means you left an opening in the tracing line.
- When you are satisfied with the profile save the image as a JPG or PNG file (go to “File” in the top right corner, choose “Share” and save to a place that you can access when using Google Drawings (for instance iCloud or Dropbox).
Getting the right sizes using Google Drawings
Online images are measured in pixels, not in centimeters or inches. You can use Google Drawings (part of Google Docs) to give your digital silhouettes and puppet templates the right size: https://docs.google.com/drawings/ (you will need to have a Gmail address). Below an annotated screenshot of a Google Drawings document, showing step-by-step instructions on how to get a profile silhouette and template for the body into the preferred size (read from 1 to 6).
- Instructional video how to make a lookalike silhouette puppet with free online tools, including Google Drawings (video created for making a puppet of a historical figure)
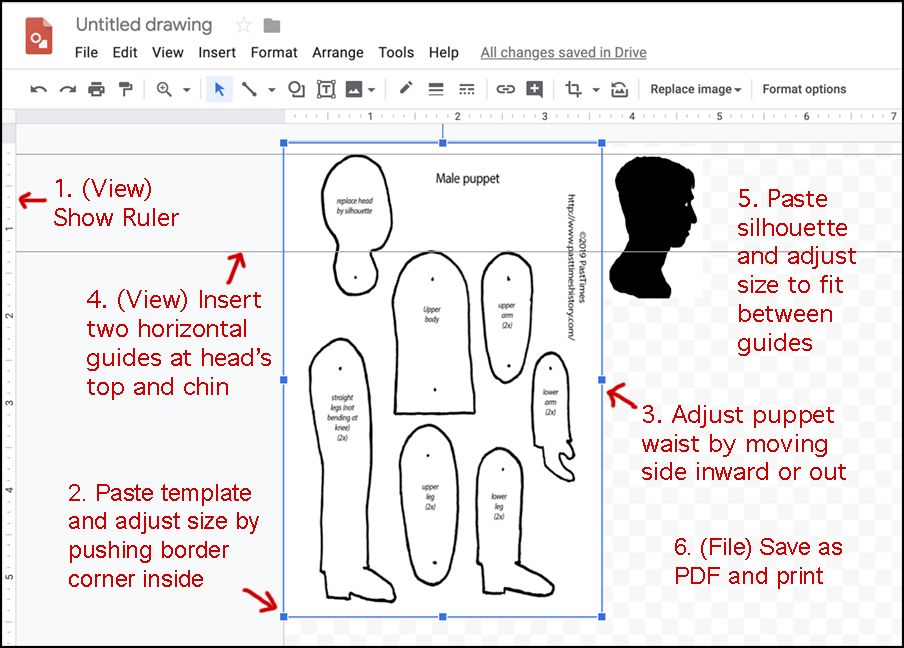
- Open Google Drawings. An untitled page appears (the checkered pattern means the background is transparent). You can adjust the size of the document in “File” in the top menu, choosing “Page setup.” Because the grownup puppets in the printable library are about 10 inch tall the templates I created are designed for letter sized printouts (In the USA that is 8.5 inch wide and 11 inch high). For the purpose of this tutorial I use the “landscape size” of 11″ x 8.5″ , because the puppets are smaller.
- In “View” in the top menu choose “Show ruler.” (In the example above I use inches (ca 2.5 centimeter).
- Open in a separate tab ”Puppet Templates to Use with Profile Silhouettes,” The templates are of a male figure and of two female figures, one wearing a semi-long or long dress, the other a suit. Shapes and sizes can be adjusted by dragging the image’s right border outward (to make the puppet wider), or inward (to make the puppet thinner, as I did with Ken in the example above).
- Download the PDF of the images you choose. Copy the image and paste it in the Google Drawing document (usually with a “right click”). If this does not work, use the “Insert” option in the top menu bar.
- To create a 5 inch tall puppet (half the size of the US letter size template) put your cursor on one of the image corners and drag it inward. Using the ruler on the side reduce the hight of the image to 5 1/2 inch for your first puppet. (If you print this out on European letter size paper it should work the same.)
- Make sure that the second puppet of the bridal couple will match his or her partner in size. Sara and Ken are about the same height, but usually one person is taller than the other. You can adjust the sizes easily in Google Drawings by dragging the image borders.
- To make the profile silhouette match the template’s head size click on “View” in the menu bar and choose “show guides.” Choose “add horizontal guide” twice. Drag the first guide along the top of the head, the second along the chin.
- Insert your silhouette by copying and pasting it like you did with the puppet template.
- Move the silhouette between the two horizontal guides and get it to the right size by pushing a corner of the image inward, so that the top of the head touches the top guide and the chin the bottom.
- In “File” in the top menu save the document as PDF and print it
Cutting the figures
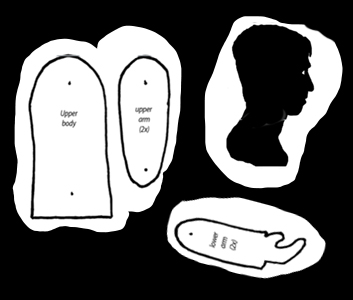
For shadow puppets I always use black poster board (stiff black craft paper). To make sure that the cake would not stain the puppets, however, this time I used a black plastic report cover from a local stationary store, thin enough to be cut with small scissors. When you find that your puppets need adjustments (smaller heads, or different size bodies) you will have plenty of plastic to make new ones.
- On the printout, adjust clothes where necessary to imitate the wedding outfit as closely as possible.
- If you want a pants-wearing puppets to have knees that bend, choose the upper and lower legs on the template rather than the straight legs. This will allow the puppet to get on one knee (for engagement parties, bachelor/bachelorette parties, or HEY, an actual proposal!!).
- Cut out body parts with a white margin and stick them to the black plastic with either a small piece of double sided tape or with a double folded piece of scotch tape.
- Cut out all body parts with small sharp scissors. Use the pointed part of your scissors to cut out the eye and to make holes in all indicated places where the pieces will be joined.
- Compare the silhouette head with the faceless template head and punch the little hole where the head connects to the body.
- Separate the paper from the black plastic body parts.
- Connect the body’s legs or skirt with the torso with a small black brad. Do the same with the upper and lower arms.
- Connect the arms, face, and body with one metal brad (arm 1, body, head, arm 2).
- Turn the head forward and backwards to see if any part below the neck will rise above the shoulders. If so, cut that away with your scissors.
Finishing up
When you are satisfied with your puppets and they match in size, all you need to do is attach barbecue skewers to the back of he puppets. Use black painters tape rather than Scotch tape if you don’t want to see the bamboo. You can also use a small piece of tape to put the puppets in the position you want (holding hands, embracing, dancing, etc.). The tape will easily come off the plastic so that the puppets can be kept in an album later without the skewers.