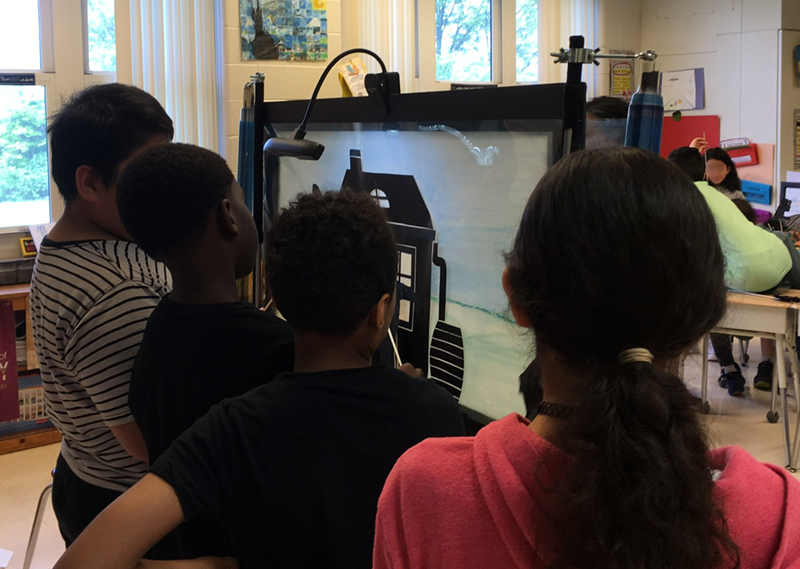
In the days when I worked with an overhead projector for shadow puppetry, I used transparent film on a rolling rack to have a moving background for travel. I truly missed this possibility when I starting to explore stories from the Underground Railroad. When I found Sue Trueman’s inspirational site The Crankie Factory, I realized that a “crankie box” — in which you scroll translucent material between dowels in an illuminated box — would be a great solution. In this post I will show how I tried out the crankie technique on my 40″ x 17″ portable screen to act out the story of Harriet Tubman’s escape from slavery in 1849.
Making the crank dowels
I chose not to use the white Tyvek that crankie artists use for their scrolls, because I use a clip-on light for my screen, which is made of 0.003″ matte drafting film. Instead, I decided to try out using transparent Grafix Dura-lar 20″ wide 0.003 clear film to scroll past the screen. Since the lamp poles that hold the screen are already covered with soft velcro, the poles serve as an excellent guide for the transparent film.
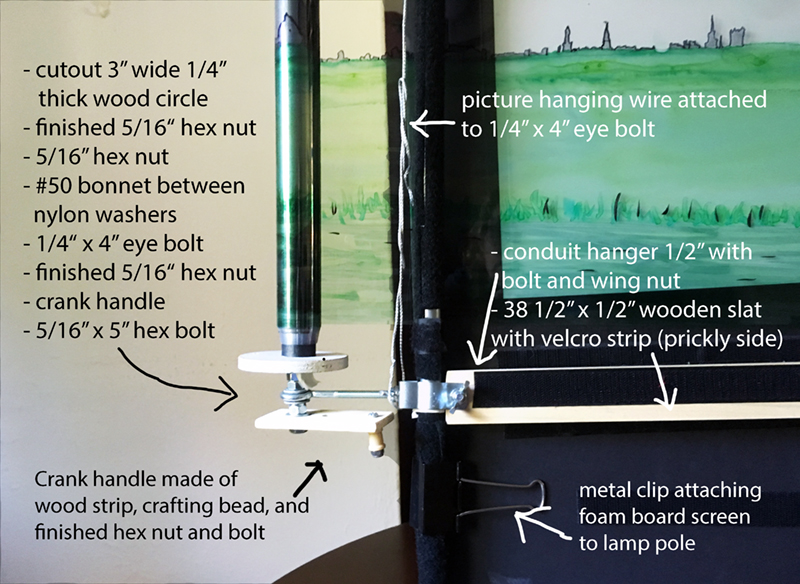
Bottom left of the screen with the crank dowel attached to the pole and the foam board screen sitting on the lamp poles’ bases.
Attaching the dowels to the full-length lamp poles turned out to make the screen top-heavy, so I detached the top two parts of the poles, which are threaded rods. The screen was positioned on three classroom desks next to each other.
Materials used
- Two straight 22″ dowels (1″ thick)
- Two 3″ wide wooden circles for the dowel’s bottom and top (optional) to prevent film traveling up and down during cranking
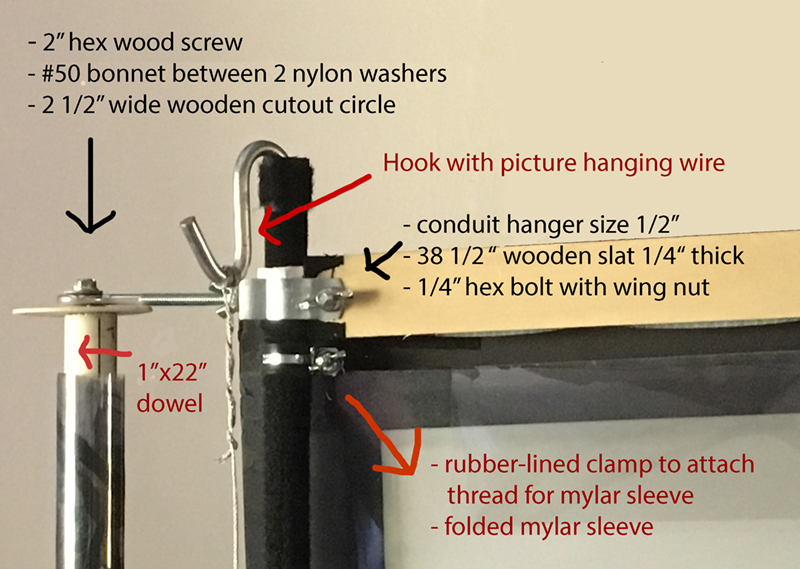
- Two 1/4″ x 4″ eye bolts and 1/2″ conduit hangers to connect dowels to the poles in straight angles
- Wood screws, hex nuts and bolts, washers, and bonnets as indicated in the photos
- Two 38 1/2″ long wooden slats: 1/4″ thick for top, 1/2″ thick for bottom slat
- Two hooks and picture hanging wire to keep bottom slat in place
- Materials for crank handle (see photo above or explore possibilities in the Crankie Factory)
Tensions and fixes
Cranking film without the support of a box frame creates a lot of tension. To avoid this as much as possible it is important that everything is attached in straight angles and lined up straight.
I used insulation tape inside the conduit hanger, as well as finishing washers for the wing nuts, to ensure that the conduit hangers stayed in place. In addition, I used picture wire to prevent the lower conduit hangers traveling down, which I hooked to the top of the poles. In addition, I used two folded pieces of mylar to keep the transparent film on top in place (a leftover at the archives where I work). I hung the fold over a metal thread, which I attached to two rubber-lined clamps that I attached to the poles.
Designing the scenes
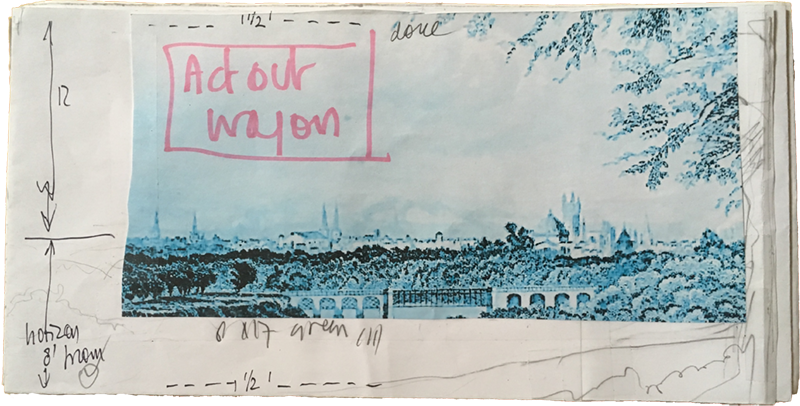
Storyboard scene with a 19th century skyline of Philadelphia
To sketch out the scenes I taped strips of paper together that represented my screen. I did image research online and printed out some historical prints, which I enlarged on a photocopier to be able to trace parts. They included the above 19th century print showing a skyline of Philadelphia and one of Arch Street, where the Pennsylvania Anti-Slavery Society happened to be based (forgive me, I’m an archivist). For the houses and trees I used black self-adhesive film and black painters tape.
Using ink on plastic film
Because only alcohol-based ink sticks to this acetate film, I used a combination of permanent black markers, brush markers, and alcohol-based inks, diluted with rubbing alcohol. I tried out many different brands of markers in an art store and found that Prismacolor and Winsor and Newton alcohol-based brush markers best avoid streaks.
As it turns out, however, a big disadvantage of using acetate film is that blending and layering is not possible. The alcohol in a new layer will dissolve the previous one, so it takes some practice (and lots of rubbing alcohol!) to make it work. For a next project I may just keep it black and white using black self-adhesive film and painters tape only.
Comments and suggestions
I’m always looking for ways to improve things, so please contact me or share any comments or suggestions in the box below!
With thanks to the creative thinkers at Princeton ACE hardware store and Sigrid Aedriaensen for their help with the scrolling mechanism.
